Webcomponents初探
Gwolf

写在前面

相信作为一名前端开发,无论是使用 vue 还是 react、augular,大家对于组件和组件化开发一定不会陌生,甚至颇有道行,但说起原生组件开发,可能许多朋友就挠头了,还有这个操作么?就好像经常用谷歌开发的人听说 IE 突然支持 ECMA 规范了,但 Web Componets 可不是什么新技术,接下来就和我一起了解一下这个‘新’技术吧。

WebComponents 介绍

Web Components 是一套不同的技术,允许您创建可重用的定制元素(它们的功能封装在您的代码之外)并且在您的 web 应用中使用它们。具体的介绍可以参照文档。Web Components | MDN (mozilla.org),这里要说的是 web components 的三大 api,以及踩到的坑。

Custom elements

1
2
3
4
5
6
7
8
9
10
11
12
13
14
15
16
17
18
19
20
21
22
23
24
25
26
27
28
29
<!DOCTYPE html>
<html lang="en">

<head>
<meta charset="UTF-8">
<meta http-equiv="X-UA-Compatible" content="IE=edge">
<meta name="viewport" content="width=device-width, initial-scale=1.0">
<title>Document</title>
</head>

<body>
<hello-custom></hello-custom>
</body>
<script>
class HelloCustom extends HTMLElement {
constructor() {
super();
let hello = document.createElement('div');
hello.innerHTML = "测试一下自定义元素"
this.append(hello)
}
}
window.customElements.define('hello-custom', HelloCustom);
</script>

</html>

图1
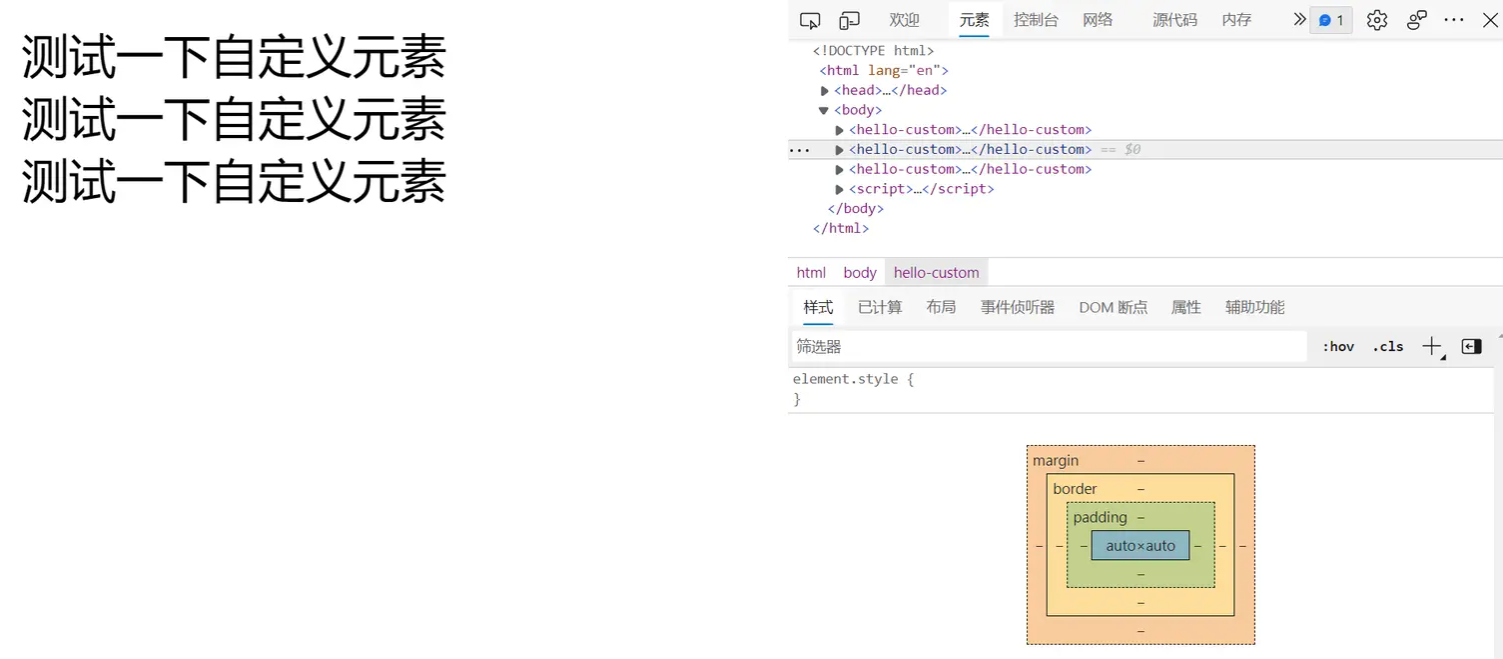
  我们可以发现,主要就是使用一个类来继承原有的 html 标签的类型。然后在构造函数中创建需要的元素,最后记得使用 this.append 方法把元素加入当前自定义标签。一个自定义标签类就实现了,然后在全局对象 customElements 调用 define 方法注册我们的组件注意:自定义标签必须是中间有一个连字符,浏览器默认单个单词是原生标签,有连字符的为自定义标签
  能够看到,用 js 生成 dom 确实是一件很麻烦的事情,所以我们可以使用第二个 API:HTML templates(HTML 模板)

HTML templates

1
2
3
4
5
6
7
<body>
<template id="hello">
<p>测试一下hello</p>
<a href="">这里是测试的模板</a>
</template>
</body>

图2
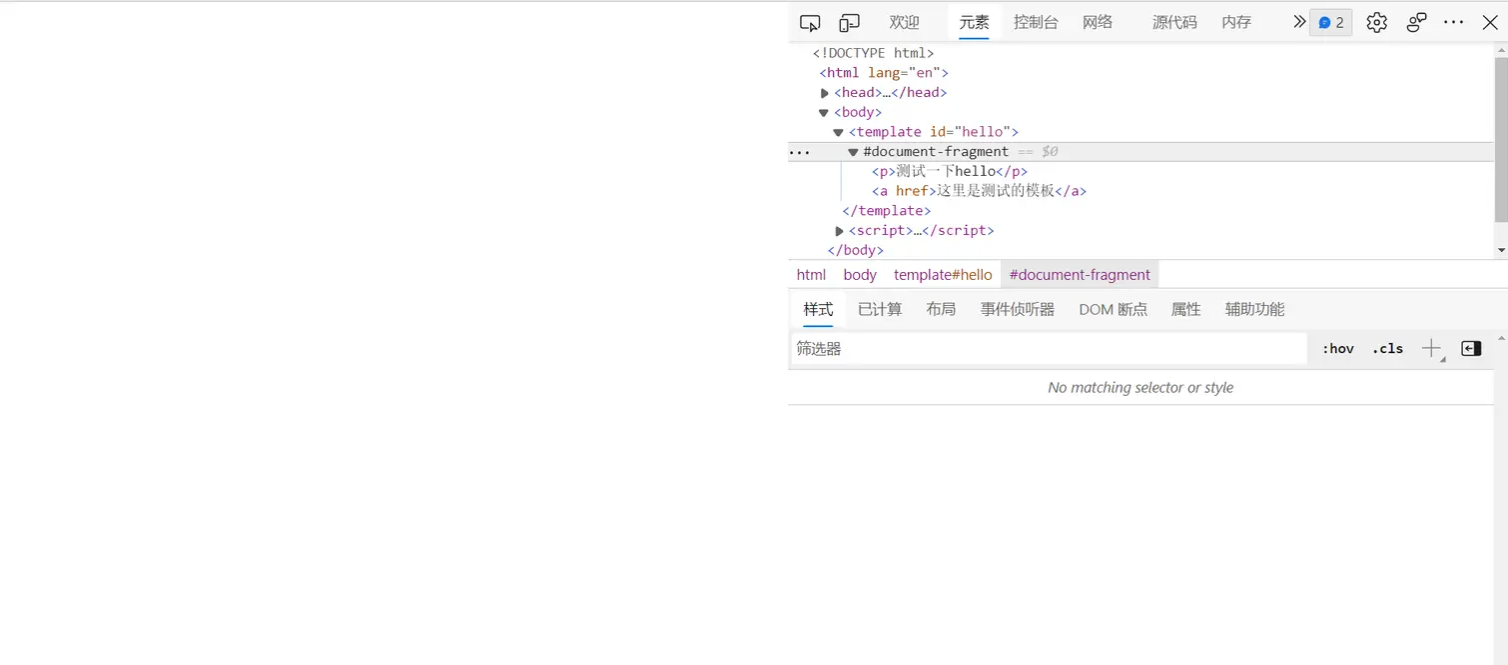
   可以看到,页面一片空白,顾名思义,template 标签只是一个模板,供给组件使用,本身不会被渲染,看到这个是不是想到了什么,是不是跟 vue 的一模一样,其实 vue 的设计就是受到了原生组件的影响,只是 vue 设计的更加深入,功能更多就是了,现在 vue3 已经支持使用原生组件了,感兴趣的可以去看看。Vue 与 Web Components | Vue.js (vuejs.org)
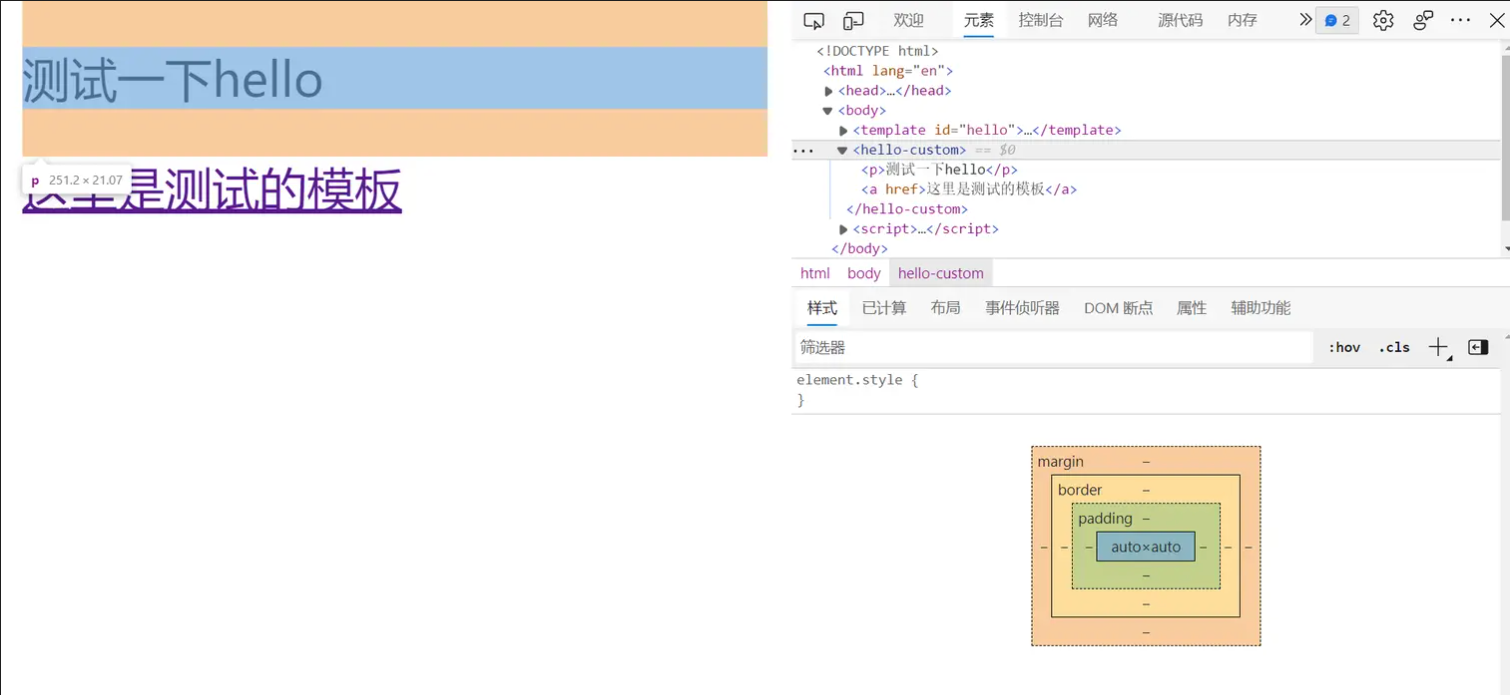
言归正传,我们怎么使用 template,其实也很简单,其中因为模板是可能被复用的,所以我们不能直接使用模板源,需要复制一份 var content = hello.content.cloneNode(true);。

1
2
3
4
5
6
7
8
9
class HelloCustom extends HTMLElement {
constructor() {
super();
let hello = document.getElementById("hello")
var content = hello.content.cloneNode(true);
this.append(content)
}
}

图3
看到这里有聪明的读者就要问了,那样式怎么写呢,难道也用 js 写上去么,其实在 template 标签里面可以写一个 style 标签的。例如:

1
2
3
4
5
6
7
8
9
10
11
<template id="hello">
<style>
p {
background-color: blue;
color: white;
}
</style>
<p>测试一下hello</p>
<a href="">这里是测试的模板</a>
</template>

图4
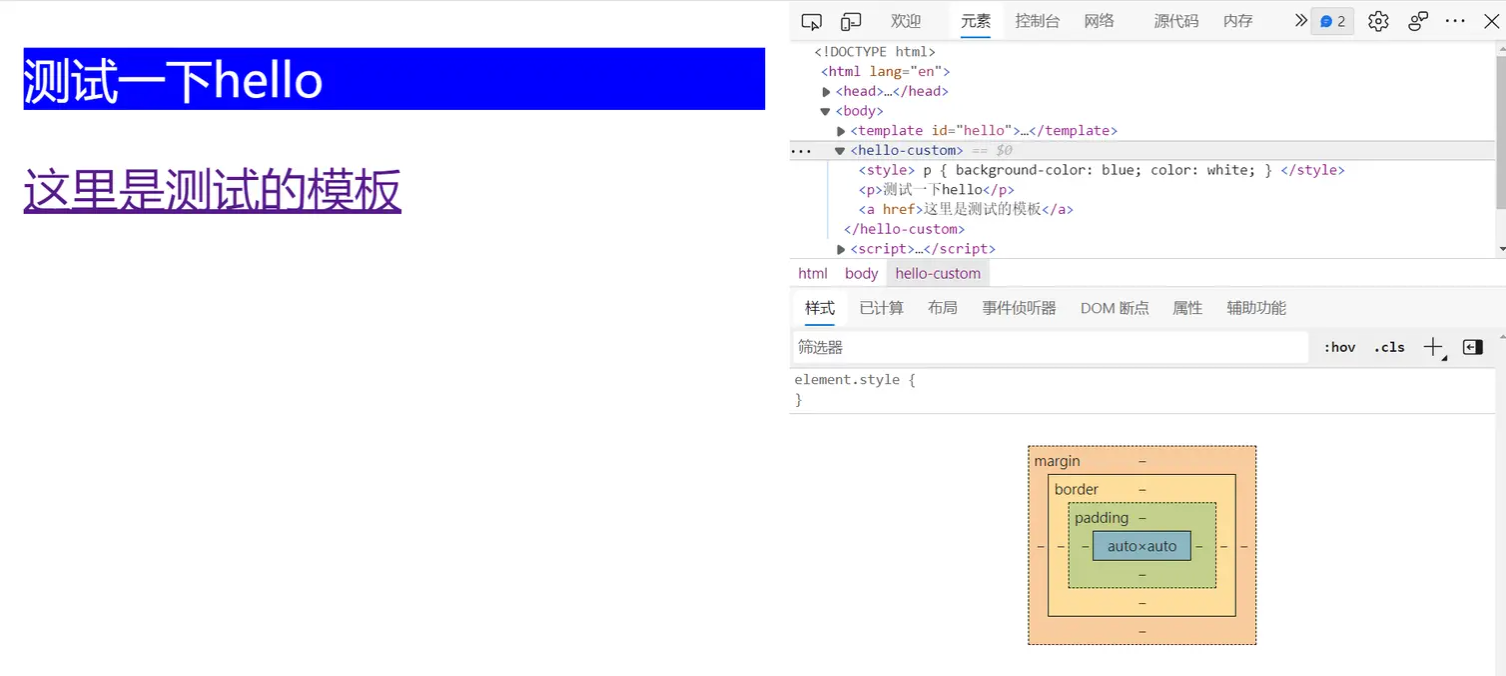
到这里看起来原生组件已经构建好了,样式组件都写好了,但我在开发的过程中又发现了一个问题,那就是 template 渲染出来的元素是真实存在的,它的样式可以被外部 css 改变,例如我这样写:

1
2
3
4
5
6
7
8
9
10
11
12
13
14
15
<style>
#htllo_test {
background-color: red;
}
</style>
<template id="hello">
<style>
p {
background-color: blue;
color: white;
}
</style>
<p id="htllo_test">测试一下hello</p>
<a href="">这里是测试的模板</a>
</template>

图5

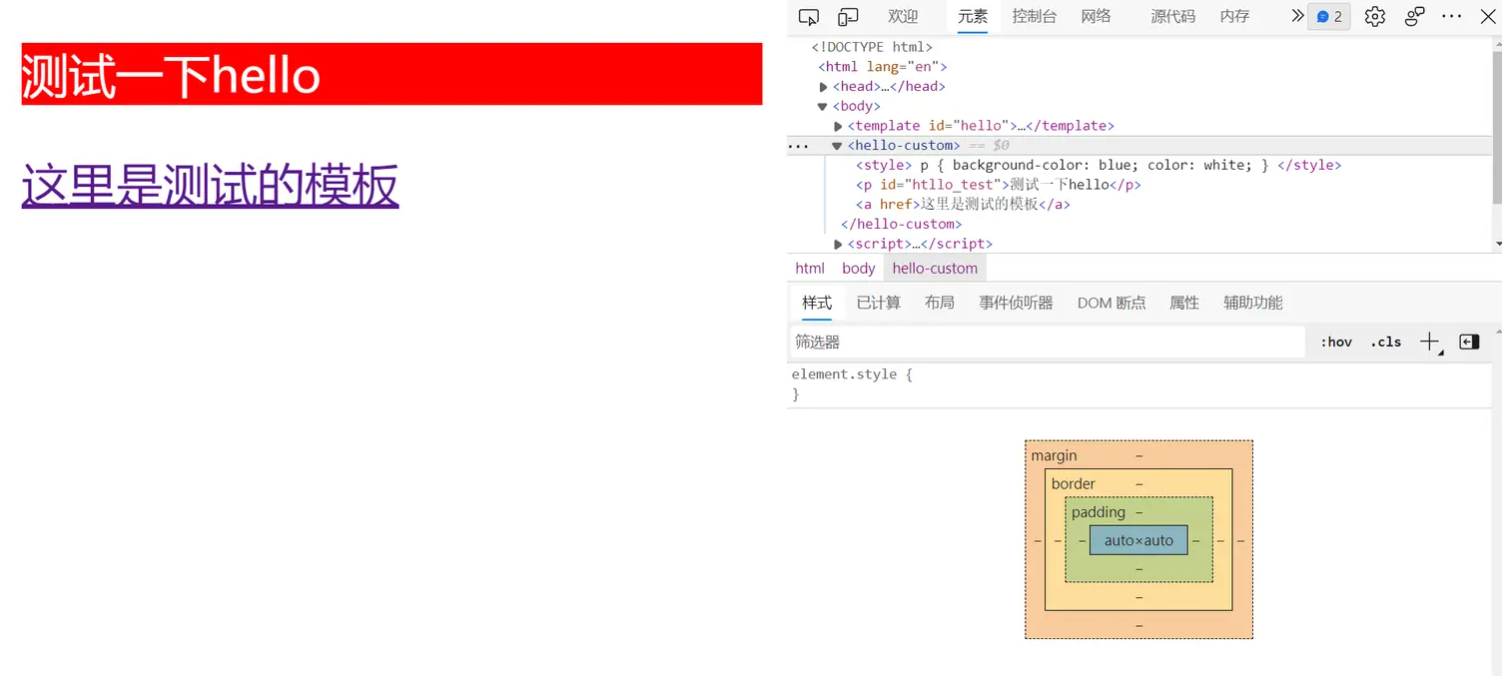
外部的 css 样式作用到了组件上面,并且权重更高,把组件内部样式给覆盖了,原本的蓝色背景,变成了红色。用过 vue 的同学都知道,vue 的 style 标签上面有一个 scope 属性,可以防止外部样式作用到内部组件上面,在我们的原生组件上面,我们要怎么实现呢,这里就用到了三大 api 中的最后一个,Shadow DOM(影子 DOM)。

Shadow DOM

所谓的影子 dom,见名知意,就是可以屏蔽外部的影响,很简单吧。我们就不搞那些花里胡哨的说法了,直接开整。

1
2
3
4
5
6
7
8
9
  class HelloCustom extends HTMLElement {
constructor() {
super();
this.shadow = this.attachShadow({mode:'closed'}) // open和closed分别控制是否能被外部js访问
let hello = document.getElementById("hello")
var content = hello.content.cloneNode(true);
this.shadow.append(content)
}
}

可以发现,使用非常的简单,只需要加入一条代码
this.shadow = this.attachShadow({mode:’open’}) 然后在选择添加的时候把我们的内容添加到 this.shadow 上面就可以了。
图6

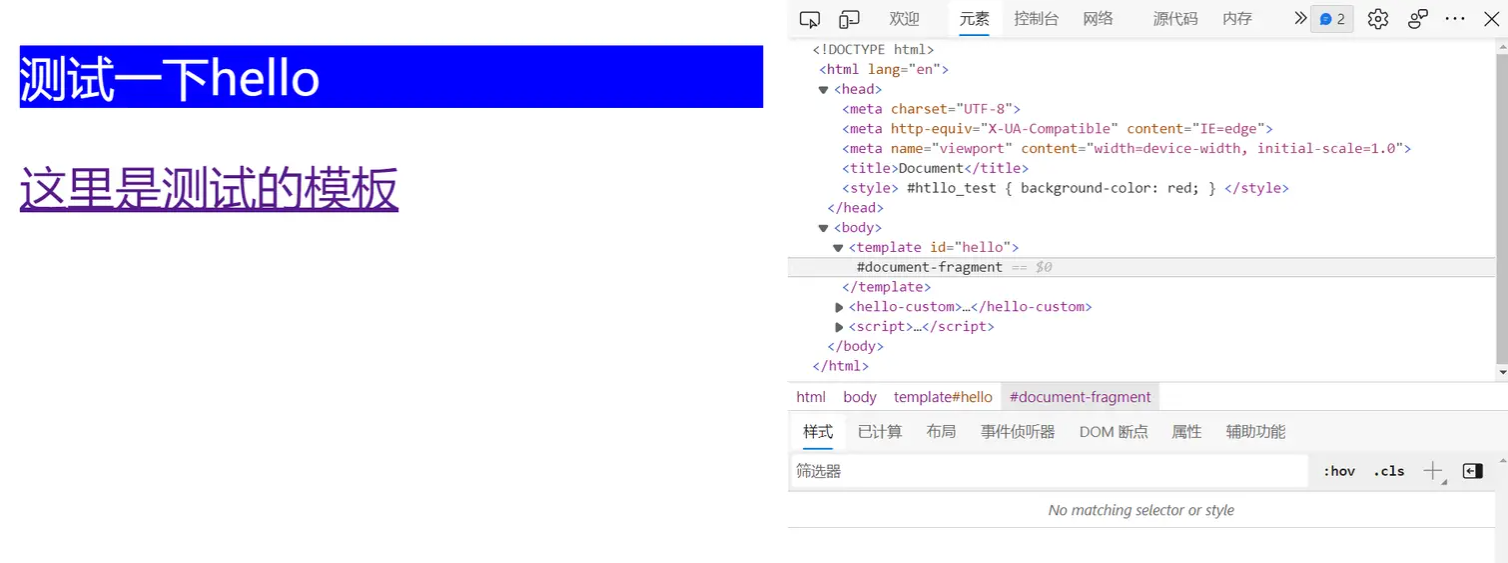
再次查看效果,可以发现,外部样式已经无法影响到内部,并且,内部的细节以及被隐藏,无法查看内部结构了,这是因为我们在使用 shadow dom 的时候选择的 mode:closed,如果选择 open,则为可以查看。它的本质是,是否允许外部 js 直接修改操作组件内部 dom。
   使用了 Shadow DOM 之后,可以在 template 中使用 Shadow DOM 的专用选择器 host 选择器,它选择的是整个 template 本身。值得注意的是,它必须显示指定 display 属性,否则不可见。
图7
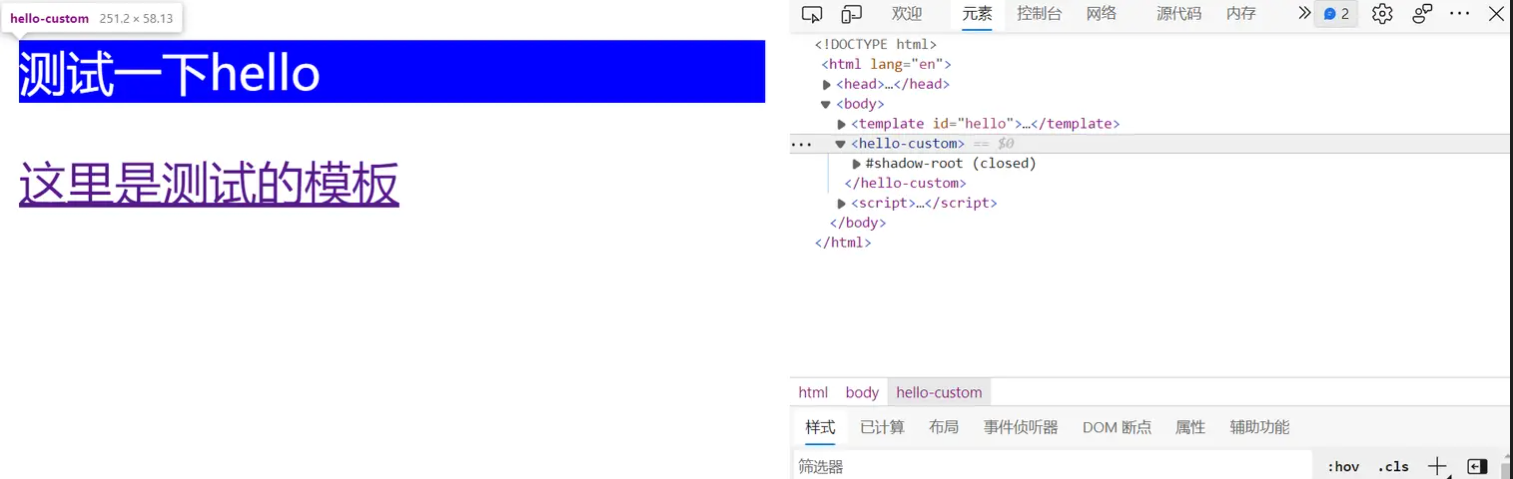
比如鼠标划上自定义元素,左侧无法框选,也无法选中。设置 display 之后:

1
2
3
4
5
6
7
8
9
10
11
12
13
14
<template id="hello">
<style>
:host {
display: block;
border: 5px solid gray;
}
p {
background-color: blue;
color: white;
}
</style>
<p id="htllo_test">测试一下hello</p>
<a href="">这里是测试的模板</a>
</template>

自定义组件生命周期

像各大框架的组件一样,元素组件也是有自己的生命周期的,这一点特别重要。至于生命周期是什么,我想不用我再过赘述,直接上代码。

1
2
3
4
5
6
7
8
9
10
11
12
13
14
15
16
17
18
19
20
21
22
23
24
25
26
class HelloCustom extends HTMLElement {
// 生命周期 - created
constructor() {
super();
console.log('created-被执行');

this.shadow = this.attachShadow({ mode: 'closed' }) // open和closed分别控制是否能被外部js访问
let hello = document.getElementById("hello")
var content = hello.content.cloneNode(true);
this.shadow.append(content)
}
// 生命周期 - mounted
connectedCallback() {
console.log('mounted-被执行');
}

// 生命周期 - update
attributeChangedCallback() {
console.log('update-被执行');
}

// 生命周期 - destory
disconnectedCallback() {
console.log('被移出')
}
}

图9

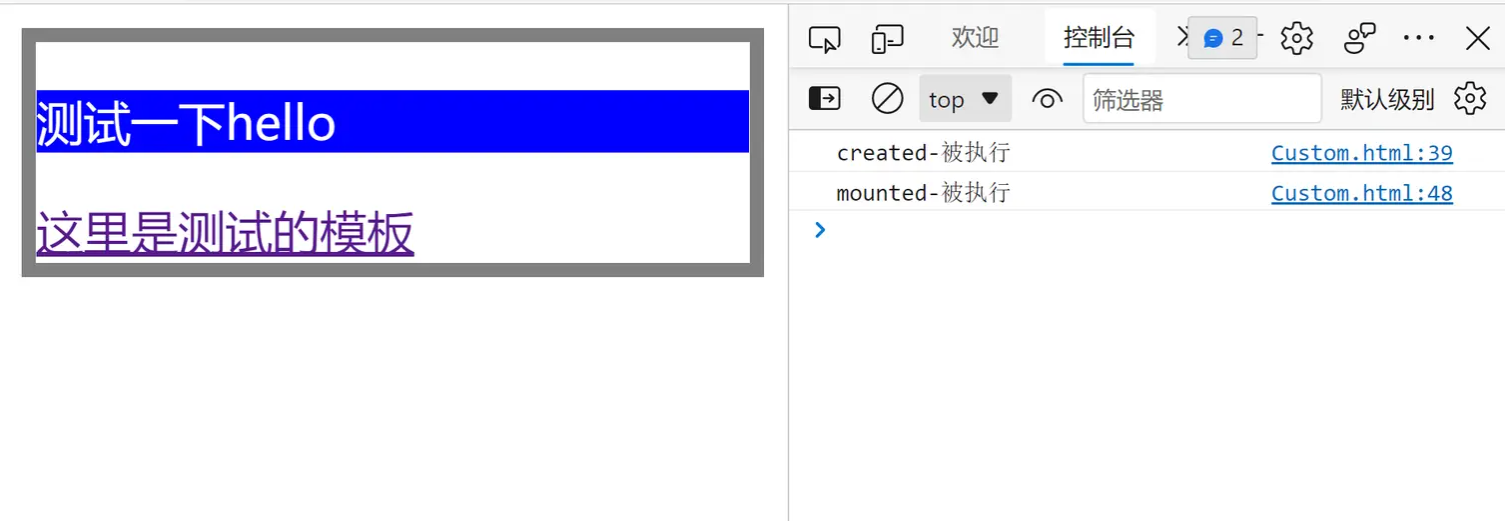
  • constructor 是构造函数,相当于 created 生命周期
  • connectedCallback 相当于 mounted 生命周期
  • attributeChangedCallback 相当于 update 生命周期,其中这里的 update 指的是,组件上面挂载的参数被更改
  • disconnectedCallback 相当于 destory 生命周期

使用 slot 插槽

你没有看错,在原生组件里面可以使用插槽,使用方式和 vue 基本上一致,可能后者借鉴了一下前者。使用方法如下:

1
2
3
4
5
6
7
8
9
10
11
12
13
14
15
16
17
18
19
20
21
22
<template id="hello">
<style>
:host {
display: block;
border: 5px solid gray;
}
p {
background-color: blue;
color: white;
}
</style>
<p id="htllo_test"></p>
<slot>slot default</slot>
<slot name="slot1">slot1</slot>
<a href="">这里是测试的模板</a>
<slot name="slot2">slot2</slot>
</template>

<hello-custom title="外部传参测试" id="hello_custom">
<div>我是默认slot</div>
<div slot="slot1">name slot1</div>
</hello-custom>

图10
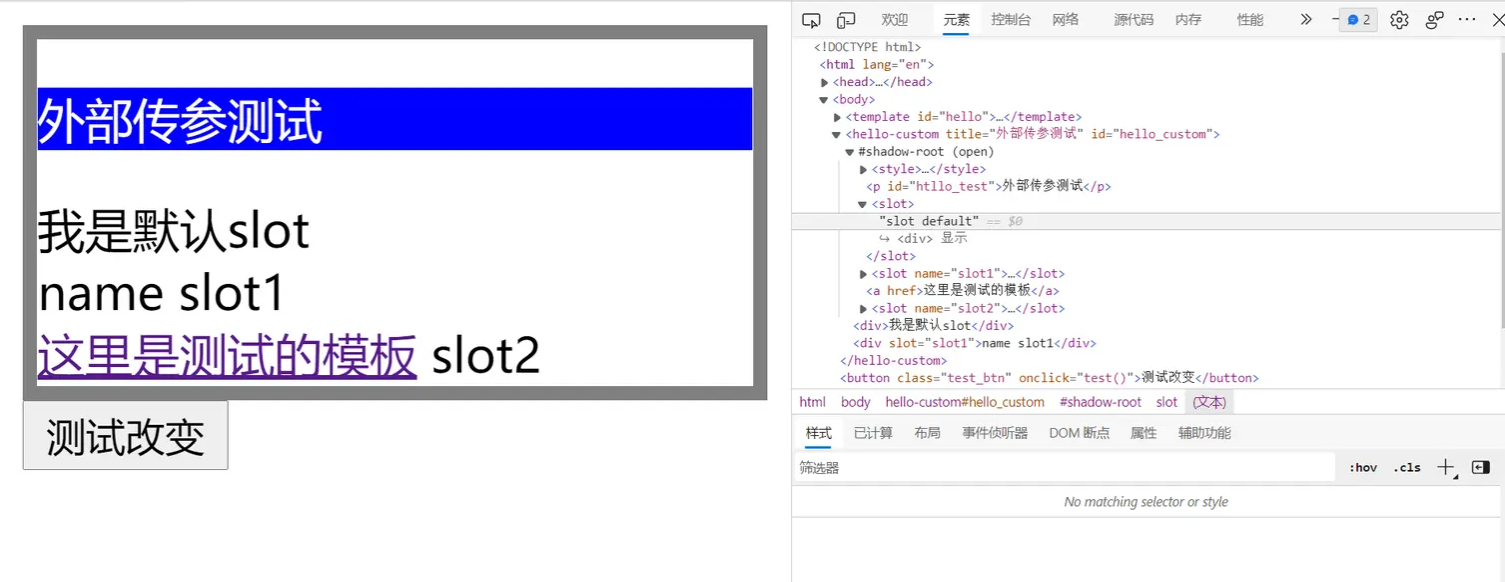
可以看到,没有 name 属性的 slot 自动变成默认插槽,组件里面同样没有 slot 属性的元素就会被默认放到其中,然后 slot 和 name 属性一一对应的就放过去。没有的就显示默认的内容,非常的简单,和 vue 基本一致。

使用经验总结及踩坑

组件必然是可以内外交流的,外部传参是不可避免的一项,使用方式十分简单。只需要在原生组件上挂载参数,然后内部获取即可。例如:

1
<hello-custom title="外部传参测试"></hello-custom>
1
2
3
4
5
6
7
8
9
10
11
12
class HelloCustom extends HTMLElement {
// 生命周期 - created
constructor() {
super();

this.shadow = this.attachShadow({ mode: 'closed' }) // open和closed分别控制是否能被外部js访问
let hello = document.getElementById("hello")
var content = hello.content.cloneNode(true);
content.querySelector("#htllo_test").innerHTML = this.getAttribute("title")
this.shadow.append(content)
}
}

图11
使用 this.getAttribute 就可以获取挂载在外部的参数,然后想怎么操作就怎么操作
其中原生组件也和其他标签一样,可以被选择和操作。可以挂载 id 和 class 被 css 操作,这里就不赘述 css 的操作了,大家下去可以自行尝试。(上面说的影子 dom 可以屏蔽外部修改,指的是屏蔽对内部 dom 的修改,组件整体还是可以改的,比如大小,背景什么的,联合 vue 的组件使用方式思考)。
js 操作元素数据需要使用生命周期 attributeChangedCallback,当外部参数被改变时,该生命周期会执行。操作如下:

1
2
<hello-custom title="外部传参测试" id="hello_custom"></hello-custom>
<button class="test_btn" onclick="test()">测试改变</button>
1
2
3
4
5
6
7
8
9
10
11
12
13
14
15
16
17
18
19
20
21
22
class HelloCustom extends HTMLElement {
// 生命周期 - created
constructor() {
super();
this.shadow = this.attachShadow({ mode: 'closed' }) // open和closed分别控制是否能被外部js访问
let hello = document.getElementById("hello")
this.content = hello.content.cloneNode(true);
this.shadow.append(this.content)
}
attributeChangedCallback(name, oldValue, newValue) {
this.shadow.querySelector("#htllo_test").innerHTML = newValue
console.log("被执行", newValue);
}
static get observedAttributes() {return ['title', 'l']; }
}
window.customElements.define('hello-custom', HelloCustom);

function test() {
let myHello = document.getElementById('hello_custom')
myHello.setAttribute("title", "修改后的外部参数测试" + new Date())
// console.log(myHello);
}

需要注意的是,如果需要在元素属性变化后,触发  attributeChangedCallback()回调函数,你必须监听这个属性。这可以通过定义 observedAttributes() get 函数来实现,observedAttributes()函数体内包含一个 return 语句,返回一个数组,包含了需要监听的属性名称。static get observedAttributes() {return [‘title’, ‘l’]; } 可以看到,已经成功得到回调。
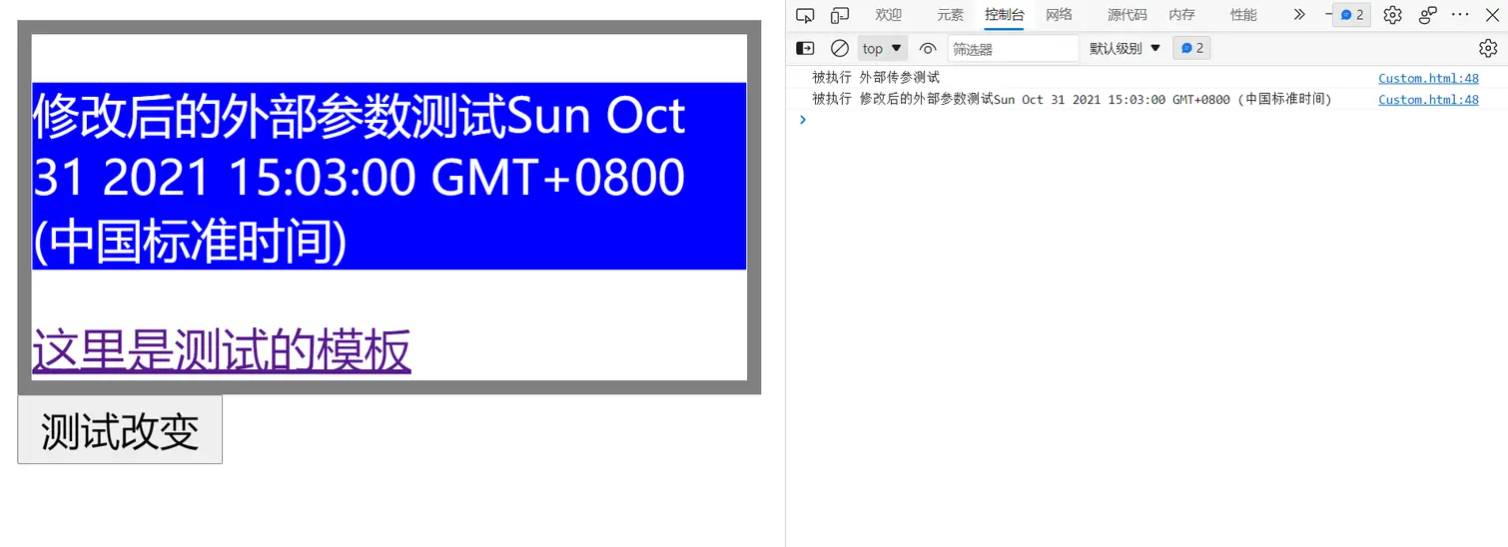
图12

外部修改内部子元素

如果 mode 设置为 open,那么可以在外部获取之后直接修改组件子元素,通常我们不建议这么做,更好的做法是使用上面的方式在组件内部进行监听,外部修改组件属性即可,这里作为一个知识点讲解,了解即可。

1
2
3
4
5
6
function test() {
let myHello = document.getElementById('hello_custom')
myHello.setAttribute("title", "修改后的外部参数测试" + new Date())
// console.log(myHello);
console.log(myHello.shadowRoot);
}

图13
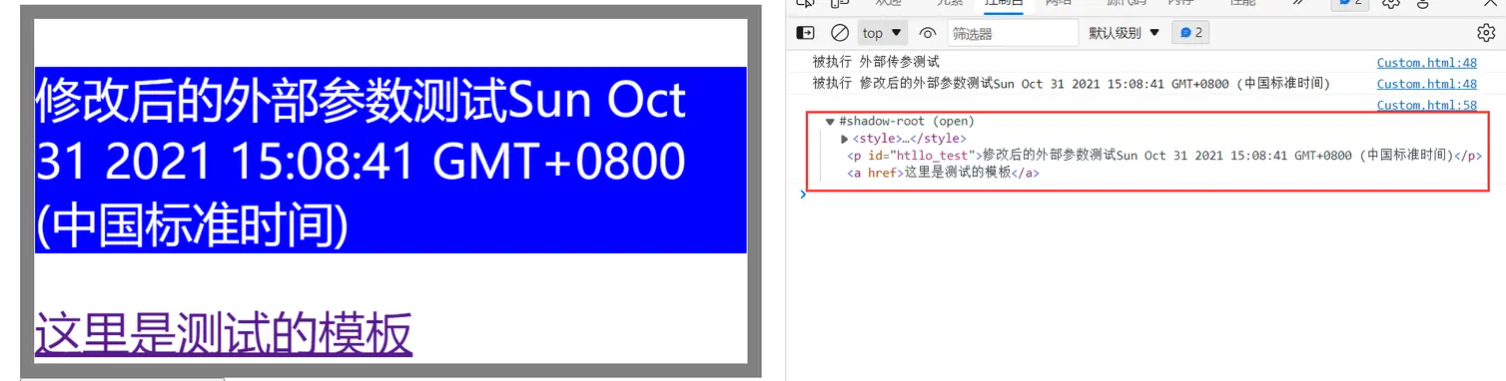
在内部获取的时候需要注意,document是无法获取模板里面的元素的,在constructor生命周期之后,要获取dom就要使用this.shoadow

总结

  • 原生组件的兼容性一般,至少IE不支持,无法通过babel弥补,需要兼容IE的请慎重。
  • 原生组件本质上也是js渲染,和vue没有太大的区别,所以,如果页面大量使用,SEO优化会比较麻烦,简而言之,就是还不如使用vue呢。
  • 无法支持模块导出template标签,template只能写到html里面
  • shadow DOM 隔离了外部js和css,这导致全局的css工具无法使用,如果不使用shadow DOM,则组件有被外部样式污染的可能。
  • 原生开发很麻烦,要使用基本上要结合pngack